

Vaping has become a popular alternative to traditional smoking, thanks to its variety of flavors and customizable experiences. At the heart of every vape device lies a crucial component known as the coil, which heats the e-liquid, turning it into vapor. Over time, this coil can become less effective, affecting the quality of your vape. Knowing when to change your vape coil is essential for maintaining a satisfying experience and getting the most out of your device. This blog explores how vape coils work, the signs that it’s time to replace them, tips on extending coil life, and how to replace them.
Understanding the Role of the Vape Coil
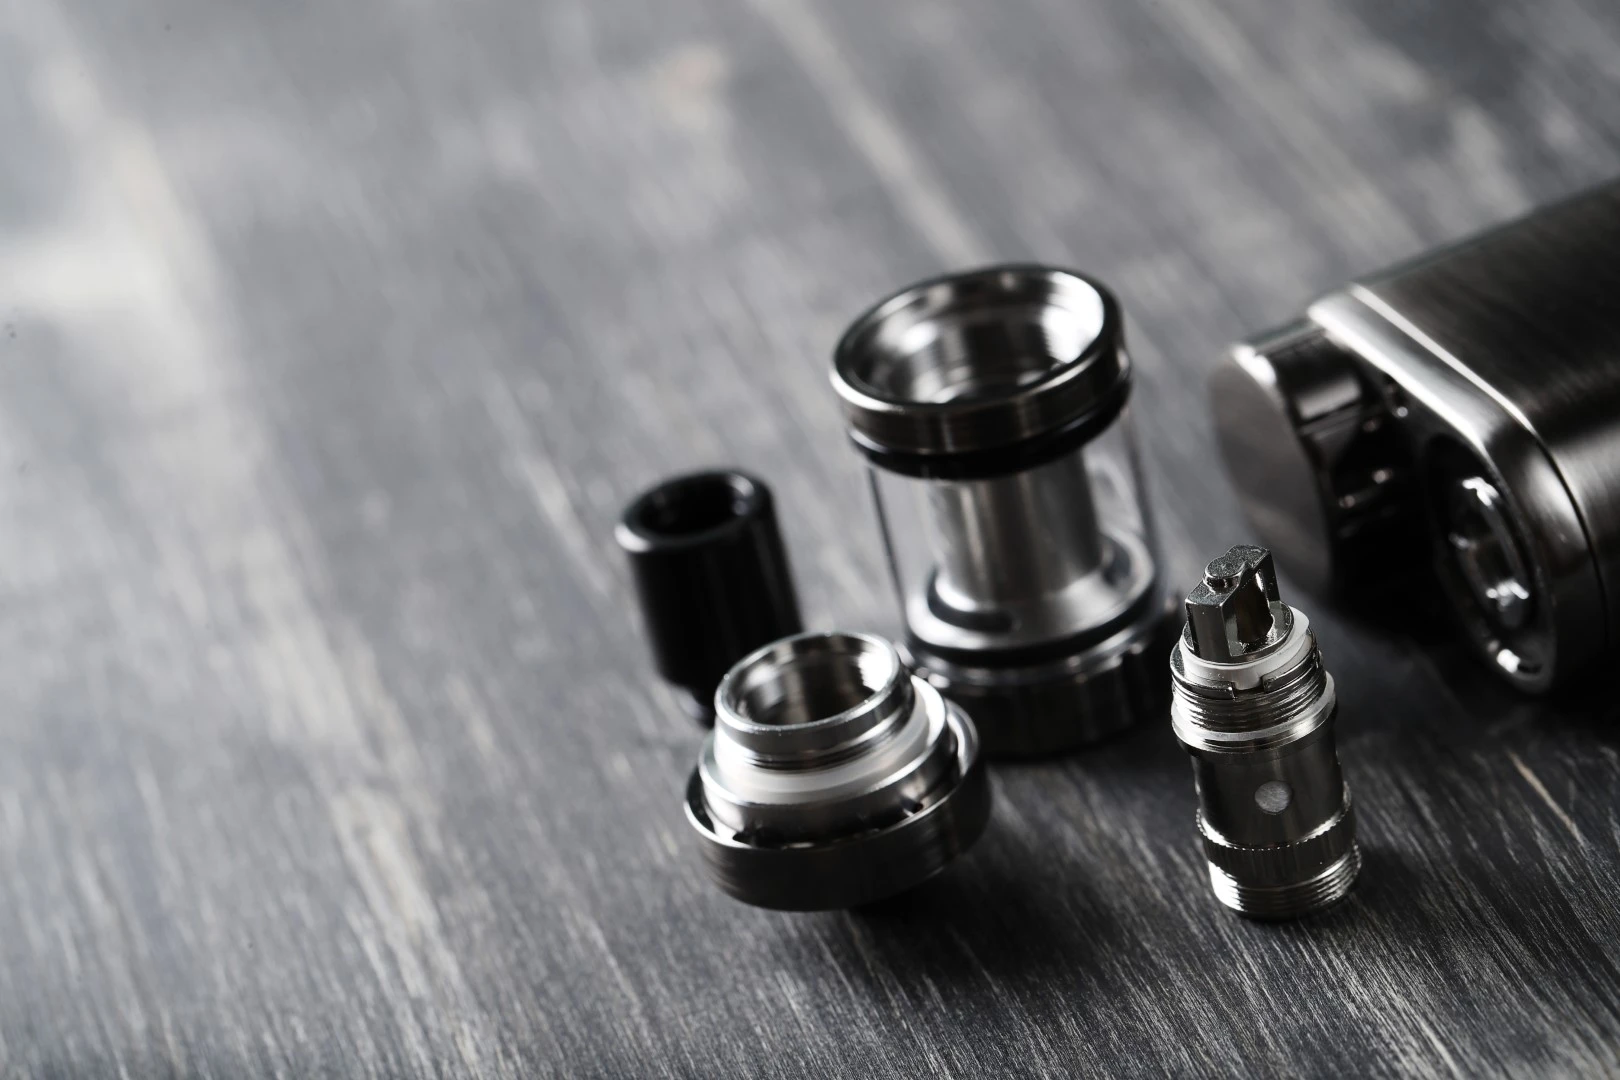
The vape coil, sometimes called an atomizer, is a small, cylindrical component wrapped with a wire that heats up when you activate your device. This heating element is typically made of materials like stainless steel, kanthal, nickel, or titanium. Inside the coil, there’s also a cotton wick that absorbs the e-liquid. When you press the button on your vape, the coil heats up, causing the e-liquid soaked in the wick to vaporize, creating flavorful clouds.
Since coils work with heat and absorb e-liquid, they’re subject to wear and tear. Over time, the material can degrade, and the wick can get clogged, reducing vapor production and flavor. Recognizing the signs that your coil is on its last legs can save you from a subpar vaping experience.
Signs It’s Time to Change Your Vape Coil
If you’re wondering when to change your vape coil, here are the key indicators to watch out for:
A Burnt Taste in Every Hit
One of the clearest signs that your vape coil needs replacing is a burnt taste when you inhale. This taste occurs when the wick inside the coil is dried or burnt, which can happen after repeated use. Even if you add fresh e-liquid, the burnt flavor may persist, indicating the coil itself has become damaged. Burnt hits are not only unpleasant but can also irritate your throat.
Reduced Flavor Intensity
Another sign that it’s time to change your vape coil is a noticeable reduction in flavor intensity. When a coil starts to degrade, it can no longer heat the e-liquid evenly, resulting in a diminished flavor experience. If you’re using the same e-liquid but aren’t getting the same satisfying flavor, your coil is likely due for a replacement.
Decreased Vapor Production
If you notice that your vape clouds are smaller or less dense than usual, it may be due to a worn-out coil. A coil reaching the end of its life cycle struggles to heat the e-liquid efficiently, resulting in less vapor. For those who enjoy producing large clouds, it’s time to change the coil.
Gurgling or Leaking Sounds
When your vape starts making gurgling or popping sounds, it’s often a sign that your coil is struggling. A coil that isn’t functioning well may lead to e-liquid flooding the chamber, causing gurgling sounds and even potential leaks. If your device becomes messier and harder to handle, it’s likely time to replace the coil to prevent further issues.
Higher Power Doesn’t Improve Performance
If you try increasing your device’s power (wattage or temperature) to improve performance but don’t see any improvement, the coil is near the end of its usability. A new coil should perform well at the recommended wattage range. If turning up the power fails to enhance the flavor or vapor production, it’s time to change.
Dark or Thick E-Liquid Residue in the Coil
Over time, e-liquid can leave a residue on the coil and wick, especially if you use sweet or high-VG (vegetable glycerin) liquids. When this residue builds up, it can block the coil from absorbing fresh e-liquid, leading to a weaker vaping experience. If you notice that the e-liquid in your vape tank is turning dark or thick, it’s likely due to coil buildup, and it may be time to replace it.
Extended Use Over Several Weeks
Even if you aren’t experiencing burnt taste, reduced flavor, or other performance issues, coils generally have a lifespan of one to two weeks, depending on usage and the type of e-liquid you use. Using a coil for longer periods can lead to a gradual decline in performance. If it’s been a few weeks since you changed your coil, it’s likely time for a replacement to keep your vape experience fresh.
How to Extend the Life of Your Vape Coil
While coils need to be replaced regularly, there are some strategies to extend their lifespan and make the most out of each coil:
Prime Your Coil Properly
Priming your coil before first use is crucial for its longevity. To prime a coil, apply a few drops of e-liquid directly onto the exposed cotton to ensure it’s thoroughly saturated. Let the coil sit in the tank filled with e-liquid for a few minutes before taking the first hit. Priming prevents dry burns and allows the coil to absorb enough liquid to function properly.
Use the Right Power Settings
Using too much power can quickly burn out a coil. Always stay within the recommended wattage or temperature range for your device. Higher power levels can cause the coil to overheat, leading to burnt hits and reduced life. If you prefer a warmer vape or larger clouds, consider getting a coil designed for higher power settings rather than turning the wattage on a standard coil.
Avoid Chain Vaping
Chain vaping, or taking multiple hits in quick succession, can overwork the coil, leading to speedier burnout. When you take too many hits in a row, the wick doesn’t have enough time to reabsorb the e-liquid, leading to dry hits and coil degradation. Taking a few moments between each hit allows the coil to cool down and the wick to resaturate, extending coil life.
Choose High-Quality E-Liquids
The type of e-liquid you use can greatly impact coil longevity. Sweet e-liquids, or those with high sugar content, tend to leave more residue on the coil. Similarly, high-VG e-liquids can be thicker, causing buildup that clogs the coil. Opting for high-quality e-liquids with less sweetener or a balanced VG/PG ratio can help extend the life of your coil.
Clean Your Coil (If Possible)
While not all coils are designed to be cleaned and reused, some can be gently rinsed with warm water to remove buildup. If you have a rebuildable or reusable coil, soak it in warm water, then rinse and let it dry thoroughly before reinstalling. Cleaning won’t restore a coil to perfect condition but can give it more life.
Types of Vape Coils and Their Lifespans
Different types of coils have varying lifespans, depending on their materials and structure. Here are some of the most common types of vape coils and how long they typically last:
Kanthal Coils
Kanthal is one of the most popular materials for vape coils due to its durability and resistance to high temperatures. It is commonly used in beginner-friendly devices and can last one to two weeks with regular use.
Stainless Steel Coils
Stainless steel coils are versatile because they can be used in wattage and temperature control modes. Depending on usage, they have a slightly longer lifespan than Kanthal coils and may last two or more weeks.
Nickel Coils (Ni200)
Nickel coils are primarily used for temperature control mode, as they are sensitive to heat and can be easily damaged if not used properly. These coils last one to two weeks and are more suited for experienced users who can monitor temperature carefully.
Ceramic Coils
Ceramic coils use a ceramic material to hold the e-liquid, providing a more consistent flavor over time. They can last longer than traditional cotton-wick coils, often up to three or four weeks, though they may be more expensive. The ceramic material resists burning, which can help prevent the burnt taste.
Mesh Coils
Mesh coils have become increasingly popular due to their structure, which provides more surface area for heating the e-liquid. This design enhances flavor and vapor production while also extending coil life, lasting up to three weeks with regular use. They’re a good choice for vapers who prioritize flavor and cloud production.
How to Properly Replace Your Vape Coil
Knowing when to replace your vape coil is essential, but understanding the correct way is just as important for maintaining your device’s performance and lifespan. Here’s a step-by-step guide on properly replacing your vape coil to ensure you’re ready for a great vaping experience.
Step 1: Disassemble Your Device
Begin by carefully disassembling your vape device. Remove the tank from the battery or mod and ensure there is no e-liquid in the tank. If there is, pour it out, as it’s best to replace the coil in a clean, empty tank.
Step 2: Unscrew the Old Coil
Most vape coils are threaded and can be unscrewed from the tank’s base. Grip the old coil firmly and twist it counterclockwise to remove it. Be cautious, as the coil may be covered in e-liquid residue, making it slippery.
Step 3: Prime the New Coil
Before inserting a new coil, it’s essential to prime it. Add a few drops of e-liquid directly onto the exposed cotton wick openings on the coil. This step helps saturate the wick and prevents dry hits, which can occur when the cotton isn’t fully soaked before use.
Step 4: Install the New Coil
Once primed, screw the new coil into the tank’s base by turning it clockwise. Make sure it’s secure, but avoid over-tightening, as this can damage the coil or tank threading.
Step 5: Reassemble and Fill the Tank
Reassemble your vape device by reattaching the tank to the battery or mod. Fill the tank with your preferred e-liquid, being careful not to overfill, as this can lead to leaking.
Step 6: Let the Coil Soak
Allow the coil to sit in the filled tank for a few minutes before taking the first hit. Soaking the coil ensures the cotton wick has time to absorb the e-liquid fully, which is crucial for a smooth and flavorful vape without the risk of dry hits.
Step 7: Start Vaping at a Low Power Setting
When you’re ready to vape, start at a lower wattage than usual and take a few light puffs to ease the new coil into use. Gradually increase the wattage to your preferred setting. This approach helps the coil last longer and delivers an optimal vaping experience.

Enjoy a Better Vaping Experience by Changing Your Vape Coil Regularly
Regularly replacing your vape coil is key to enjoying your device’s full flavor, thick vapor, and optimal performance. Watching for signs like a burnt taste, reduced vapor production, and loss of flavor will help you identify when it’s time for a new coil. By taking steps to care for your coil—such as priming it properly, avoiding chain vaping, and choosing the right e-liquids—you can extend its life and make the most of your vaping experience. If you need help determining when to change your coil, check the manufacturer’s guidelines or talk to other experienced vapers who can offer advice. With a little attention to coil maintenance and replacement, you’ll keep your device running smoothly and enjoy vaping at its best.
For more expert tips on maintaining your vape and enhancing your experience, visit our Select Vape blog.